Booking commerce is a saas based online booking software which allows your customers to book your services in any slot of the day. Booking Commerce will help you manage all your bookings without any hassle at a very low cost and null maintenance.
In this, we have introduced numerous Booking commerce supported add-ons to enhance the functionality of your booking system.
You just need to visit the “Add-ons” section of your booking e-commerce system and there you can install them as per your requirements.
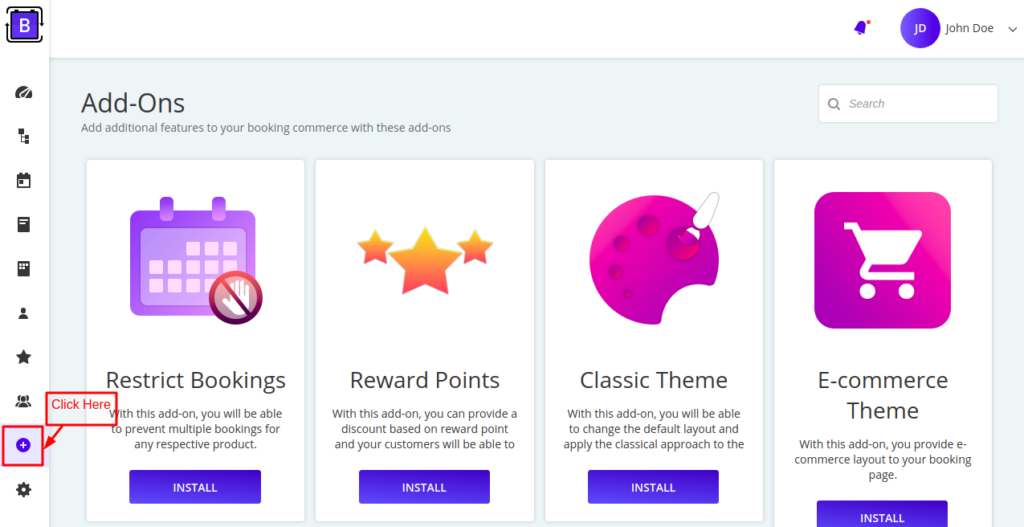

Let’s check out booking commerce supported add-ons one by one.
Restrict Bookings:-
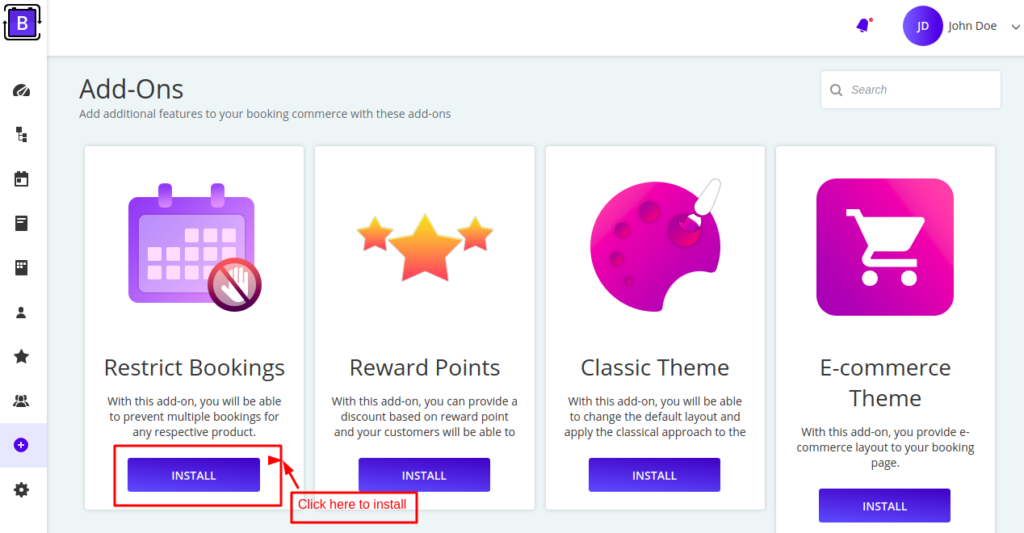
Restrict booking is a must have addon in your booking commerce system as many times same customers book different slots on the same day but they actually don’t come to the service side so this will not only affect the genuine customers (who are willing to book a slot on the same date) but also affects your income. So in this add-on admin can create 4 types of rules to restrict bookings:
1)Restrict booking if already booked- If you don’t want the same customer to book your same service/product again and again then you can create a rule by choosing this option.
2)Allow bookings based on emails- In this option, Admin can enter the Email IDs of those customers from whom you want bookings.
3)Allow bookings based on token- In this option, Admin can generate tokens from backend and your customers need to enter that token while booking your service. Only then they can make bookings.
4)Allow booking after n number of days- If any customer has already booked your service then they are eligible to book your service again only after the number of days you have entered from this option.
Firstly Install this add-on from the “Add-ons” section of your booking commerce system. You are required to be on the “Executive Plan” or higher plans of booking commerce to install this add-on.

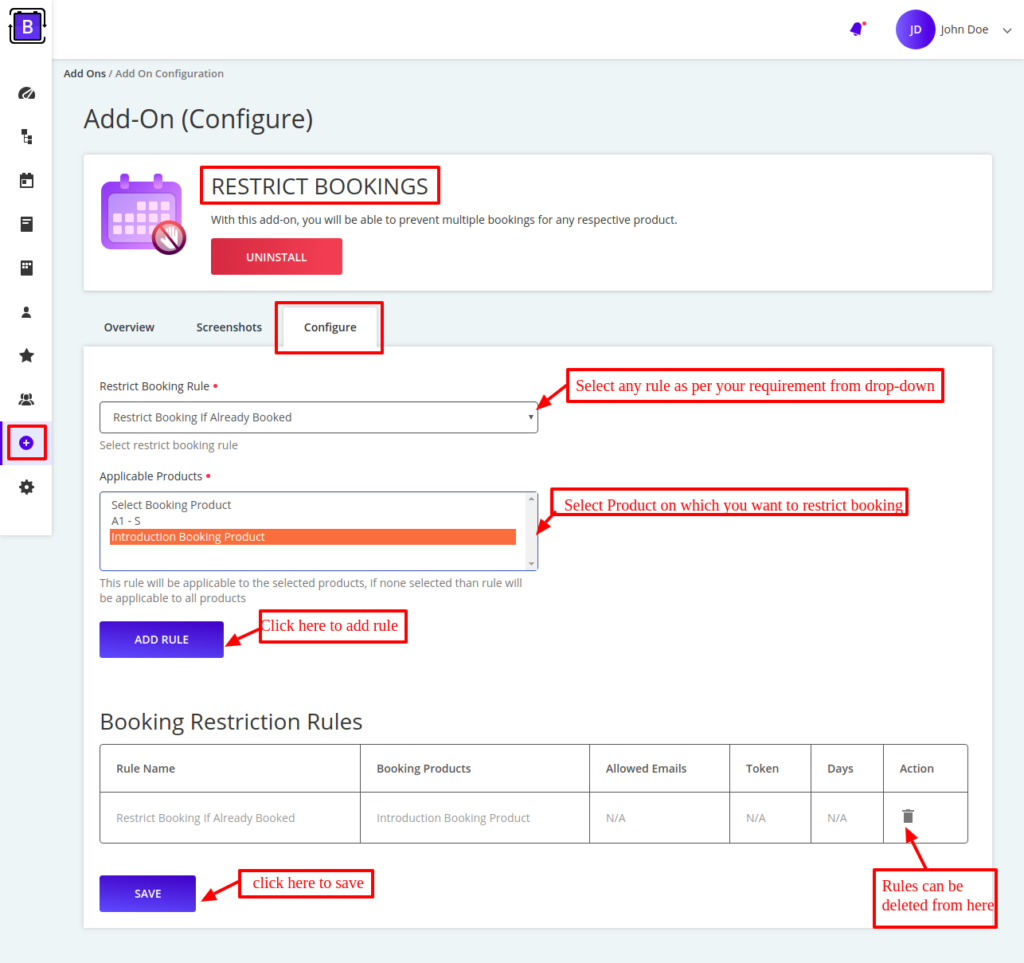
Now once you install this addon then visit the “Configure” section by clicking on “restrict booking” addon.
Admin end of Booking commerce->> Add-ons->> Restrict Booking->> Configure->> Create rule by selecting any of the 4 options from drop down as per your requirement->> select rest details->> Save

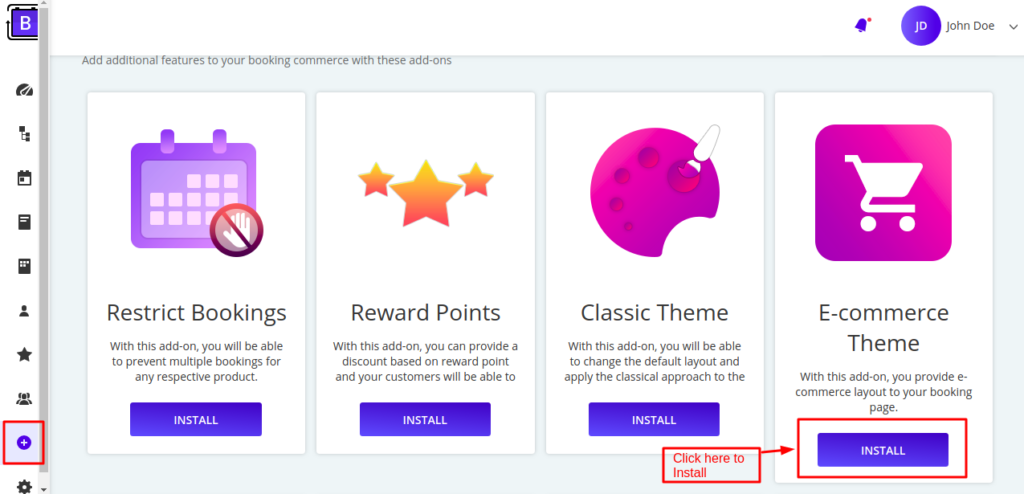
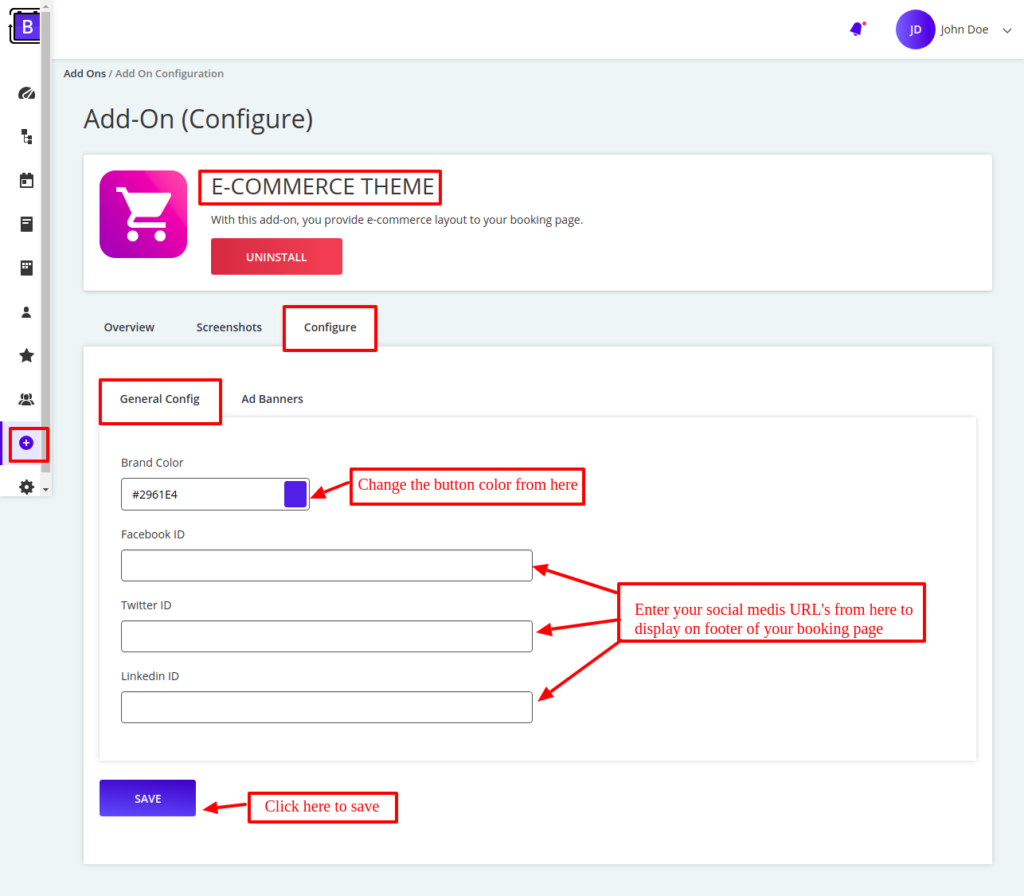
E-commerce Theme:-
You can now change your booking commerce system theme with this addon name “E-commerce Theme” and provide your customers ultimate booking experience. You can expect something more unique with this theme as you can make your booking pages feel like an e-commerce store.
Install this add-on from the “Add-ons” section of your booking commerce system. You are required to be on the “Executive Plan” or higher plans of booking commerce to install this add-on.

Once you install this add-on, visit the “configure” section by clicking on “e-commerce theme” add-on.
Visit “General configuration” tab and from here you can change the button colors of your booking page and even add social media URL’s to display on the footer.

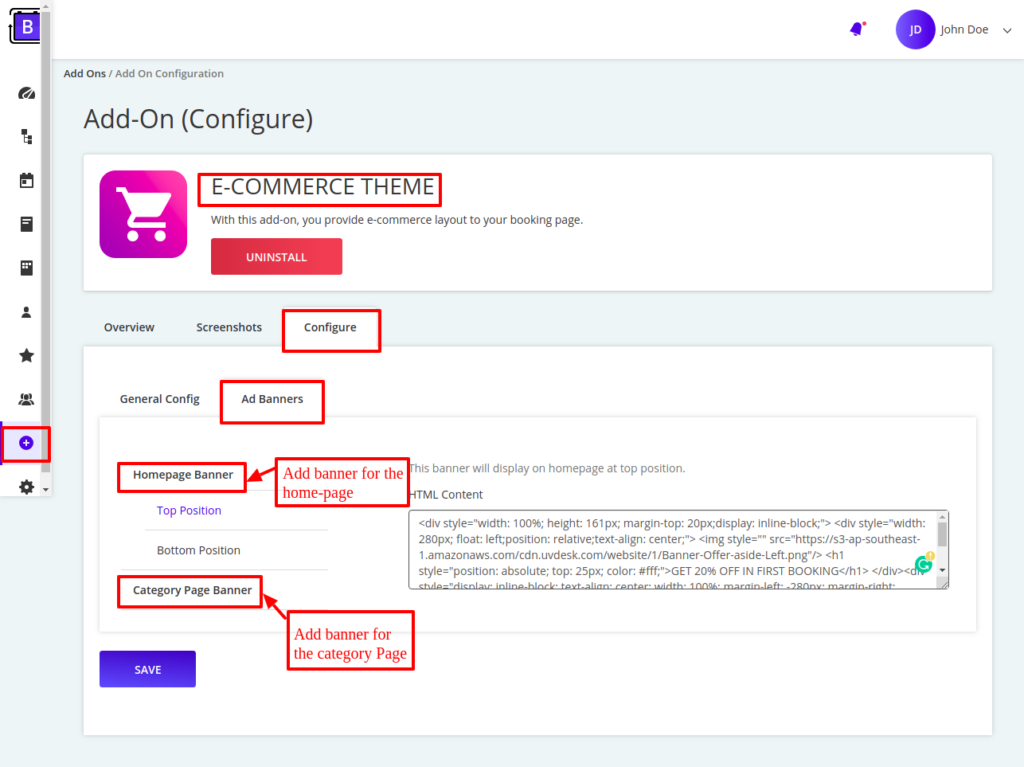
To add banners for home-page or category page, visit “Add Banners” tab.

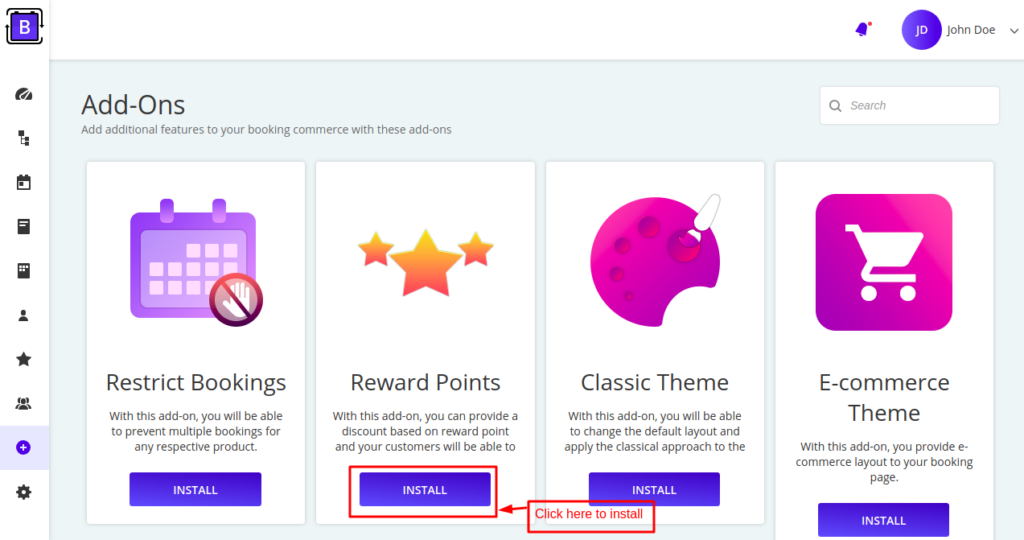
Reward Points:-
Increase your sales with this add-on as you can offer reward points to customers on bookings. In this add-on you can set reward point on the basis of booking price or any booking product which can be redeemed by customers while booking your slot.
Install Reward point add-on from add-on section of the app:

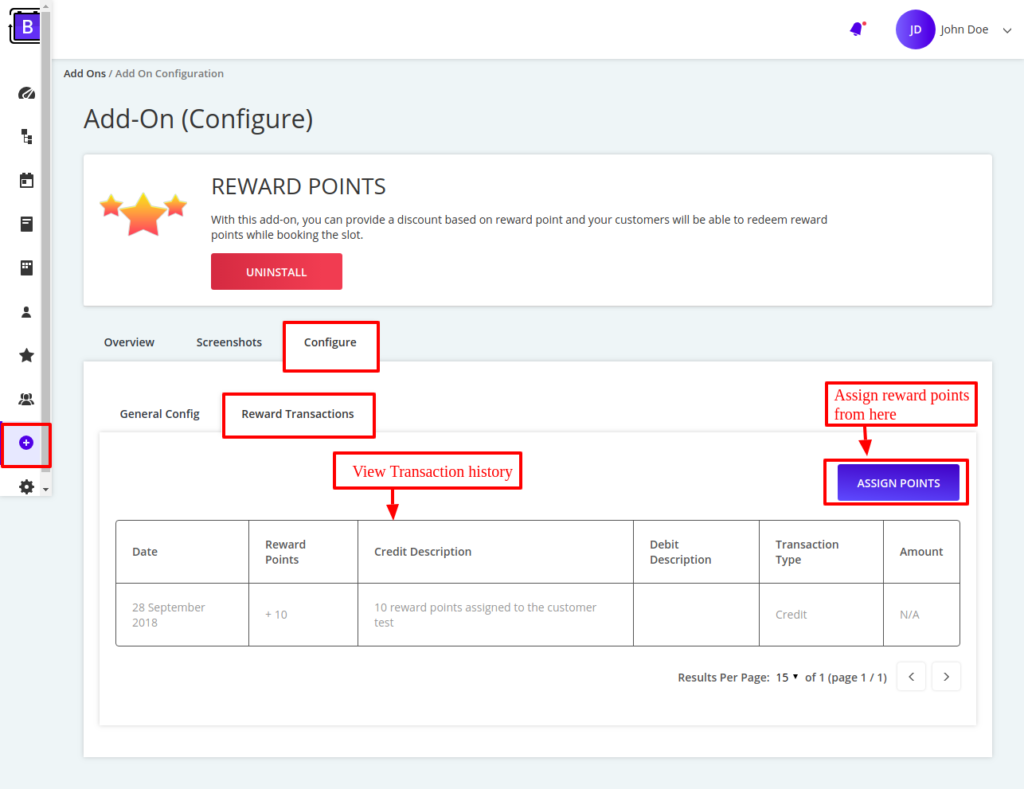
Now visit “Configure” section by clicking on “Reward Point” add-on. Here in “general configuration” section set the reward points on the basis of “booking price” or any Booking product and then set monetary value of each reward point from ” reward point worth” tab:-
![]()

Now visit the “reward transaction” section to view the transaction history of reward points. Here you can also assign the reward point to the customer by entering his/her email ID from “Assign Point” tab.

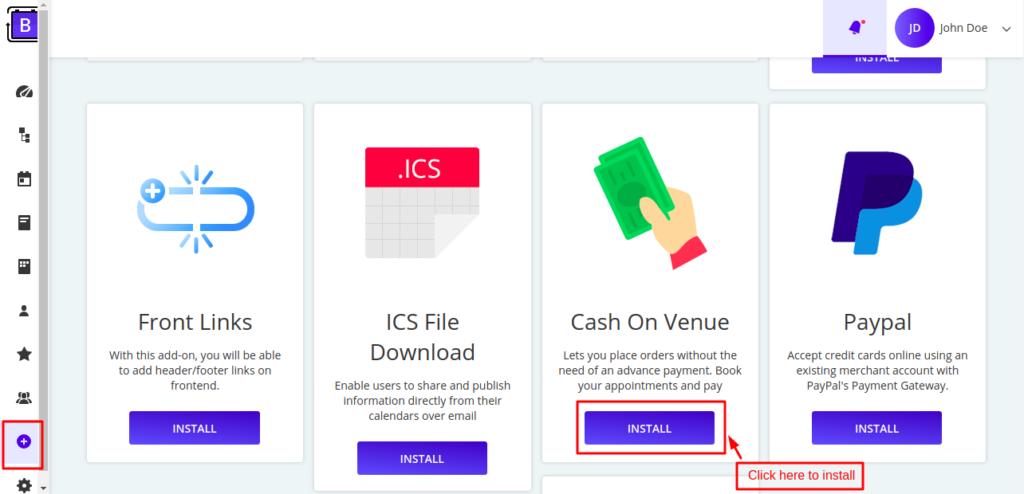
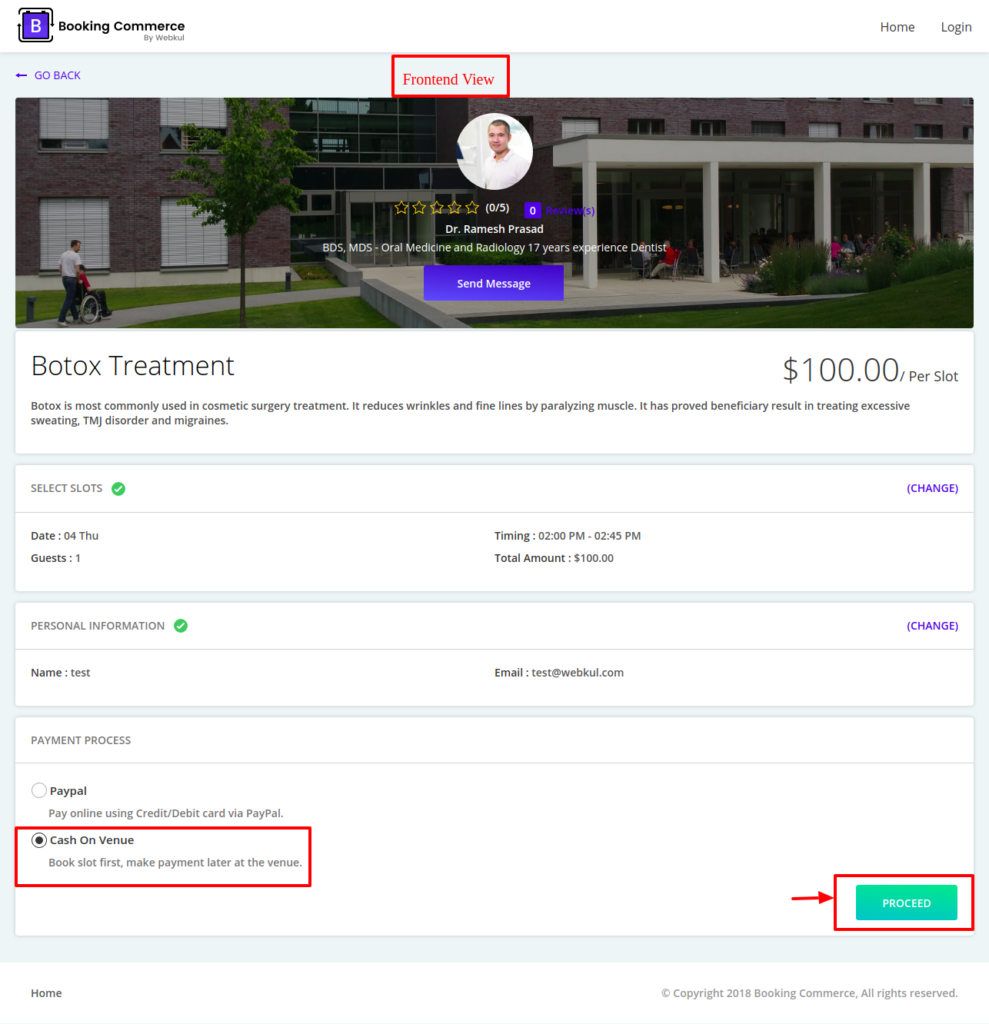
Cash On Venue:-
Boost up your business with this add-on as it provides a hassle-free option to your customers where they can directly pay at the venue for their appointment. Install this add-on from “Add-ons” section of the app. Once you will install this add-on on your “booking commerce system”, customers will get the option to choose “cash on venue” payment method while booking your services/products.
Frontend View:

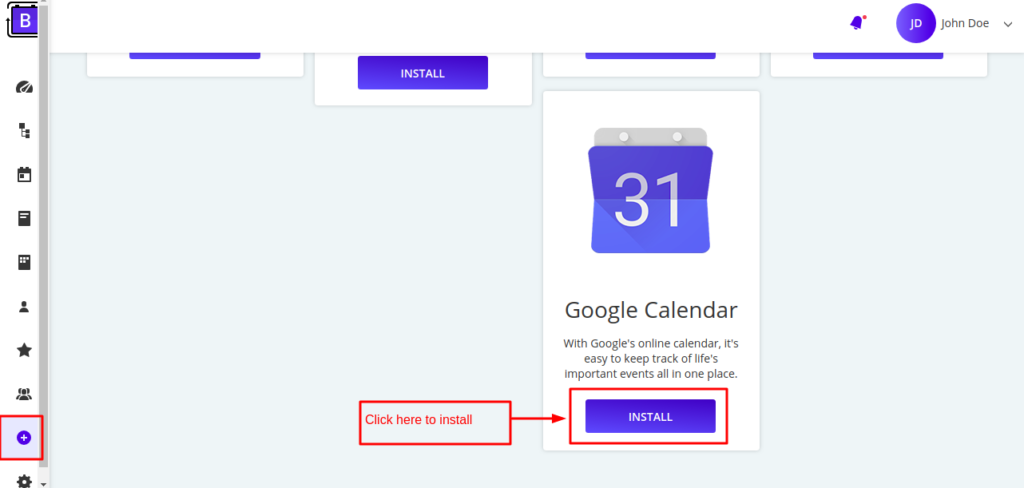
Google Calendar:-
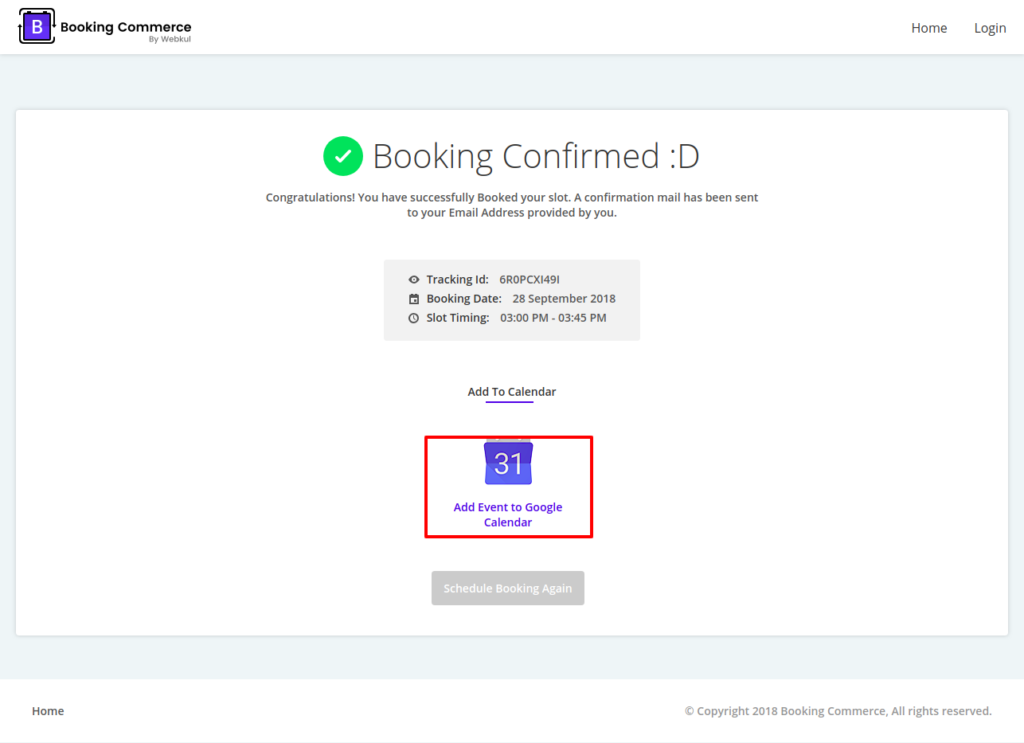
Till now only admin is easily managing all his/her bookings through calendar view in their booking commerce system but now we have integrated Google calendar in our booking commerce system through which admin can now give the option to their customers to add their booking event in their google calendar so in this add-on whenever customers will make booking appointment for admin services/products and when booking is set to auto-approved by admin then customers will get option to add that booking event in their google calendar on their booking confirmation page.
Install this add-on from “Add-ons” section of the app:-

Once you will install this add-on and you set the booking to be auto-approved then while booking your services/products, customers get the option to add that booking event in their google calendar as shown in below screenshot:-

PayPal:-
Accept the payments online from your customers when they book your services/products via PayPal. Visit “add-on” section of your booking commerce and install “PayPal” add-on from there:-
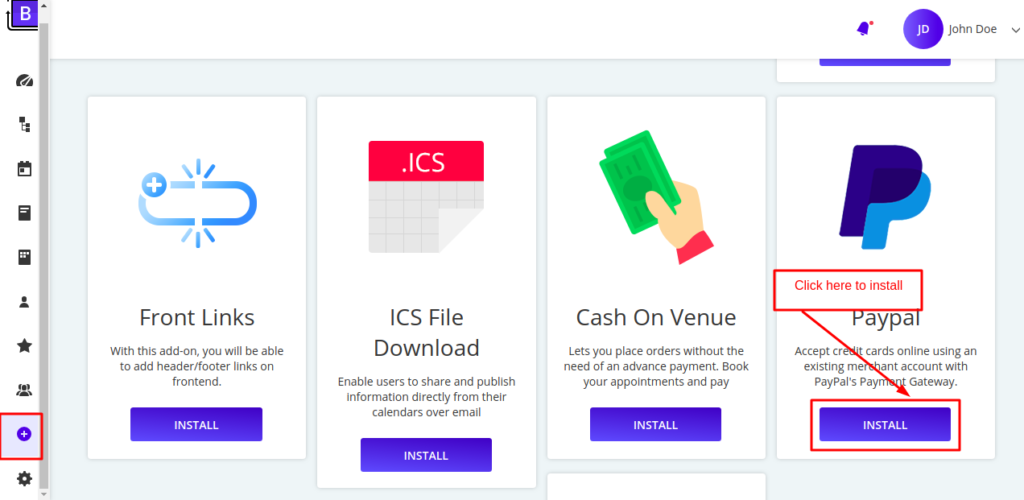

Once you will install this add-on, customers will get the option of “PayPal” as their online payment method to pay for the services/products.
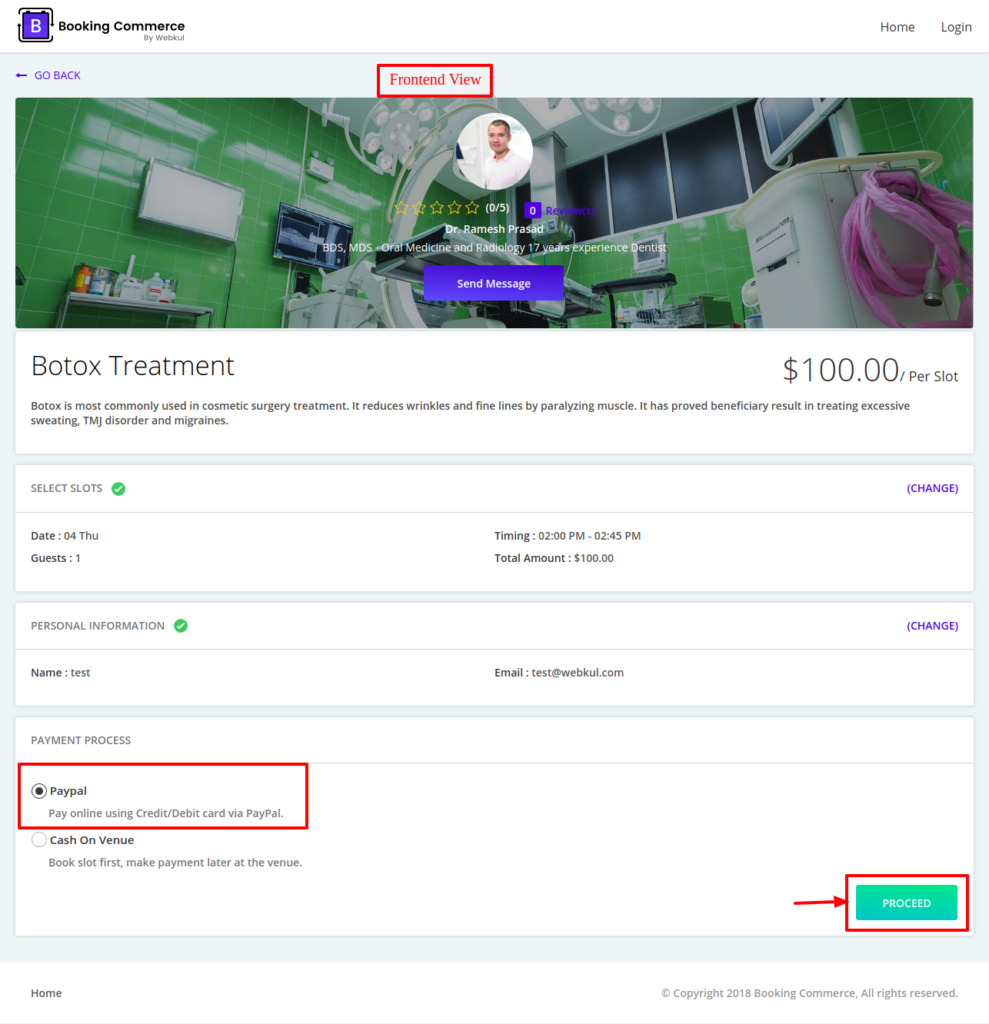
Frontend View:-
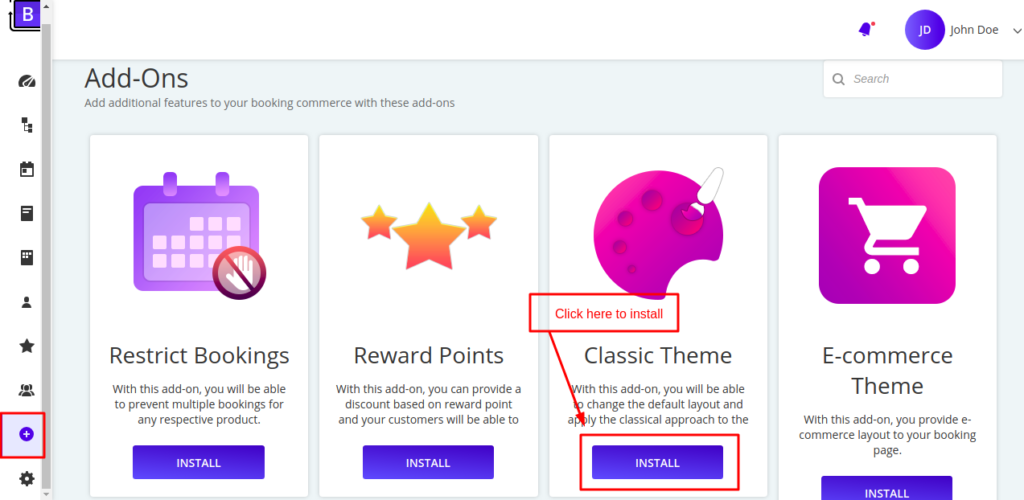
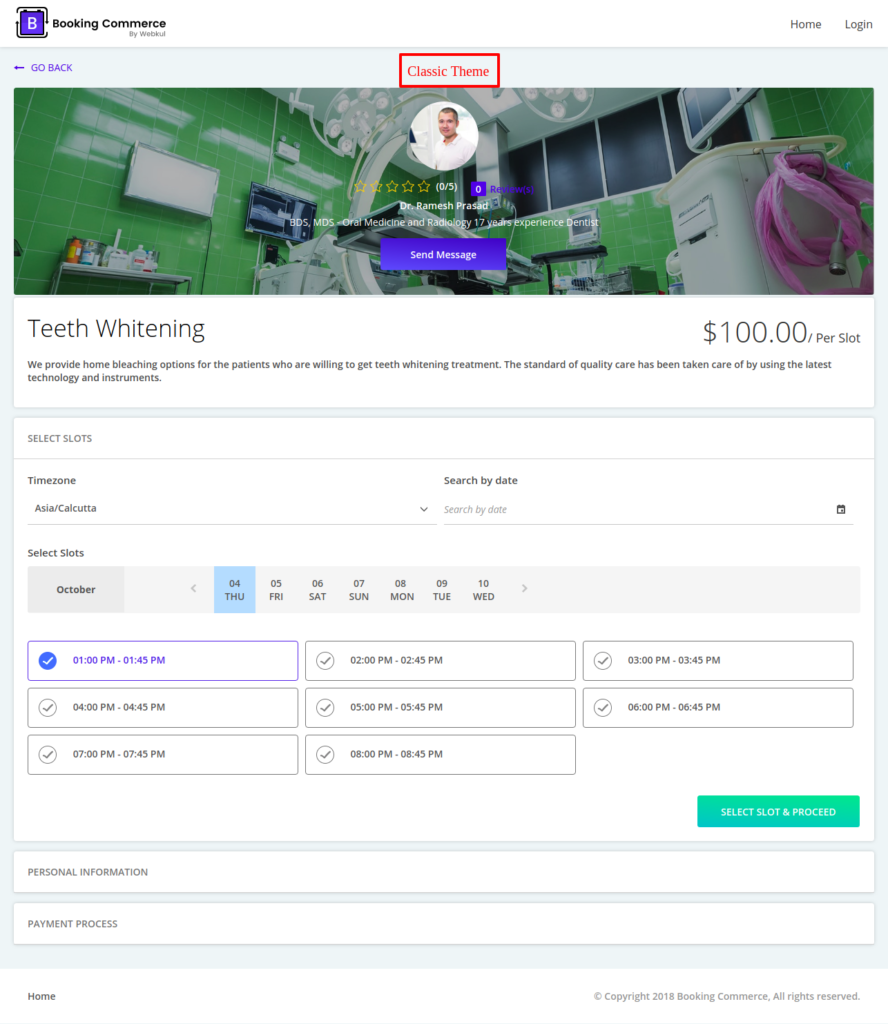
Classic Theme:-
Change the front end look of your booking e-commerce system to the classic theme with “classic theme” add-on. To install this add-on, Visit “Add-ons” section your booking commerce system.
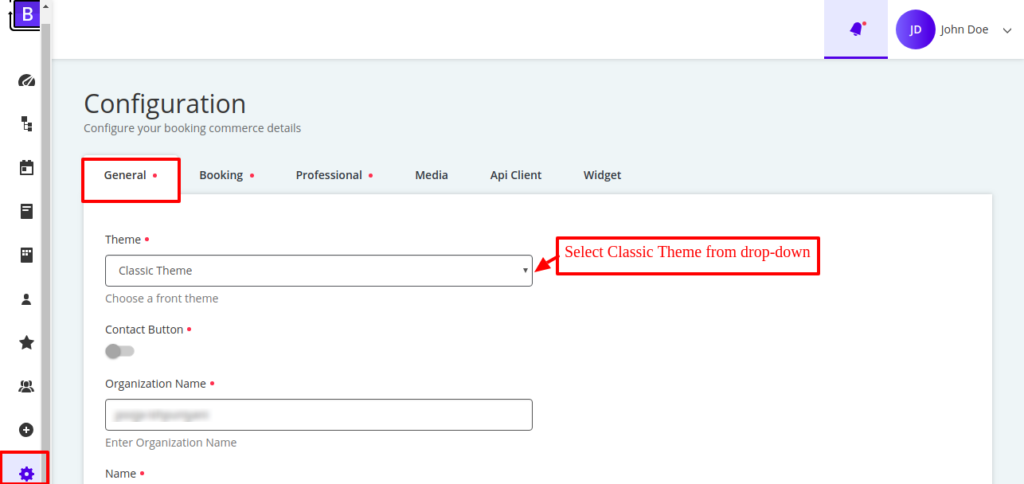
Now once you will install this add-on then to change your booking commerce system theme to classic theme you need to visit the “Configuration” section.

Frontend view of classic Theme:-

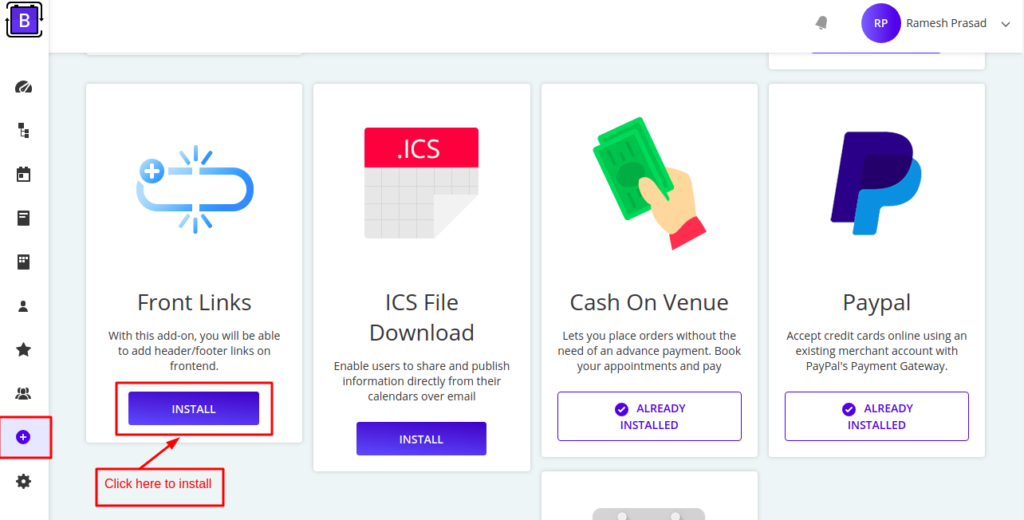
Front Links:-
Currently, on the booking product pages, customers can only book your services/products but you can make those booking pages look like a website by adding “Header” and “Footer” menus like “About Us”, “Contact Us”, “Home-page” and much more with this “Front Links” add-on.
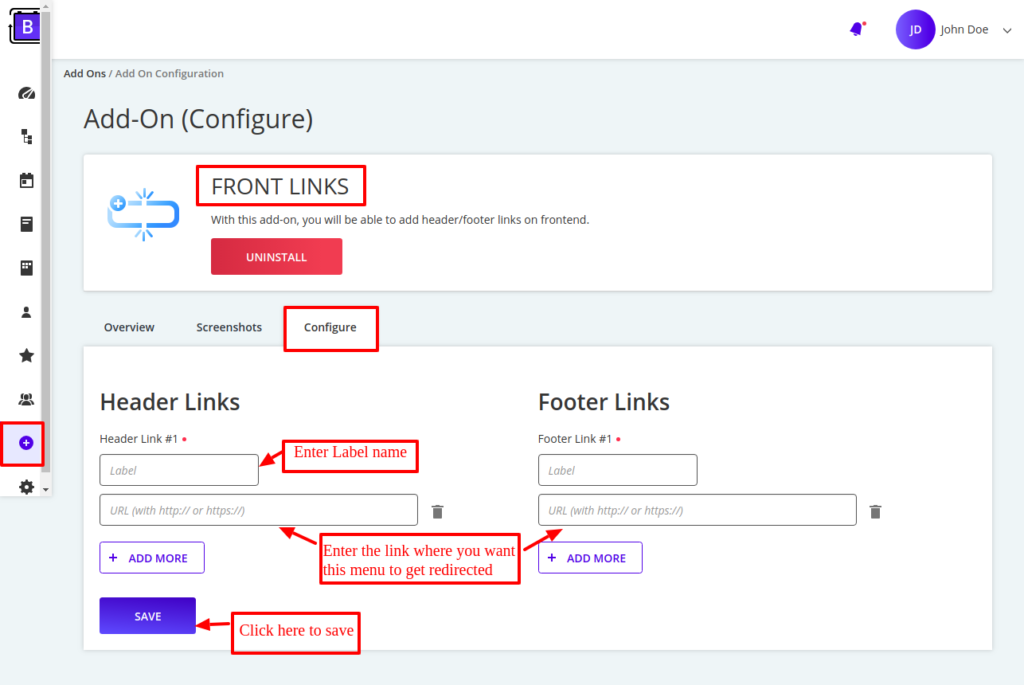
You just need to enter the label name and the redirection link while creating header and footer menus so when customers click on that menu’s they will get redirected on the links which have been entered by admin while creating that menus.
Visit Add-on section and install “Front Links” add-on.

Now visit the “Configure” section by clicking on “Front Links” add-on and add header and footer menus.

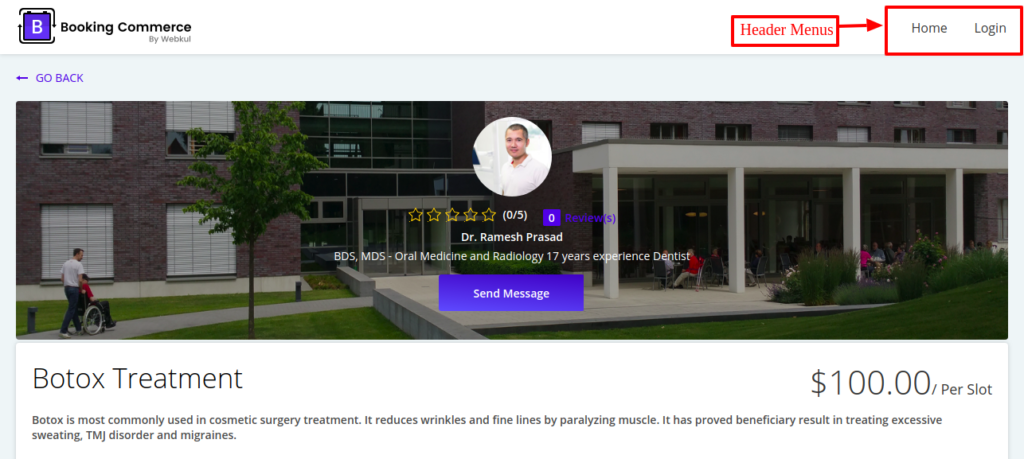
Now on the frontend of booking page, the menu’s will appear like this as shown in below screenshot:-

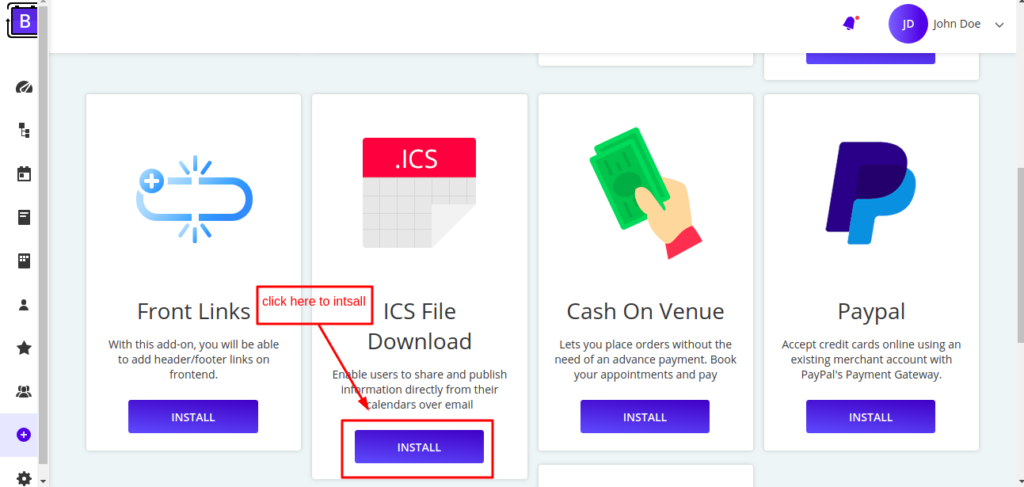
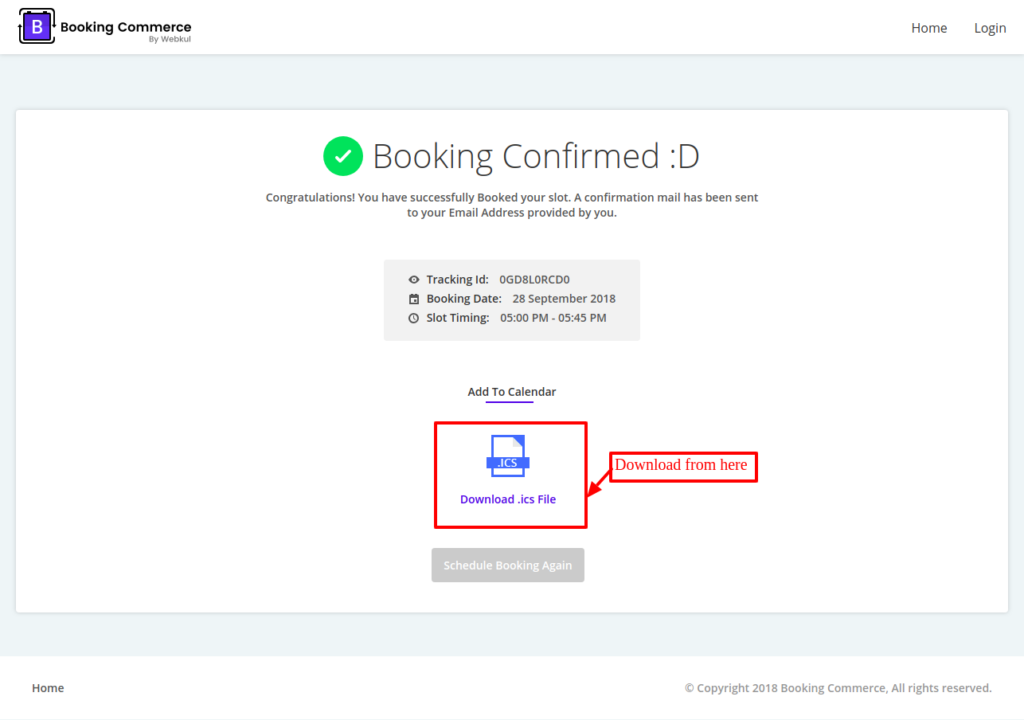
ICS File Download:-
With the help of this add-on, when customers will book your services/products and when admin set the bookings to be auto-approved then customers can be able to download the .ics file for their booking events directly from their booking confirmation page. Customers can import that .ics downloadable file to their Google calendar, Yahoo calendar, Outlook etc and those booking events will get added to their respective calendar.
To install this add-on visit “Add-ons” section of your booking commerce system.

Now once customer will make the booking then they will get the option to download .ics file from their booking confirmation page as shown in below screenshot:-

Support:-
Hope you like this blog..!!
Feel free to leave your suggestions in the comment box and for any query/issue just send us a mail at support@webkul.com or simply raise a ticket at https://webkul.uvdesk.com/en/customer/create-ticket/